Preface[]
Certain SlingBoxes have the a built in IR sensor that allows it to learn the IR remote control codes from a physcial remote control. You'll be able to save the remote profile to your Sling Account and upload it to your Slingboxes for use in your Slingplayer program Sling Media has created a beta website that you use to learn remote codes. (http://betaremotes.slingbox.com)
Requirements[]
Slingbox compatible models[]
- Pro
- Solo
- Pro-HD
Sling Account[]
- with Admin access to the respective Slingbox
Operating Systems[]
- Windows XP
- Vista
Web Browser[]
- Internet Explorer 7
- Internet Explorer 8
- Firefox 3
Web Slingplayer Plug-in*[]
- Version 1.4.0.90 or higher
- Some of the files have been moved around but the javascripts haven't been updated to reflect those changes. If you have a problem downloading the plug-in from the betaremote website, then you'll need to download the current Web Slingplayer Plug-in from (http://watch.slingbox.com) prior to using to the Betaremote website.
Login[]
In order to use the Betaremote website, you'll need to log into your Sling Account. If you've connected to the website without logging into your Sling Account then you'll be redirected to "accounts.sling.com"

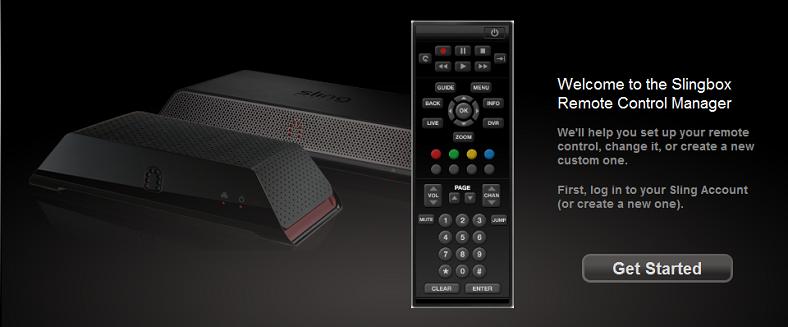
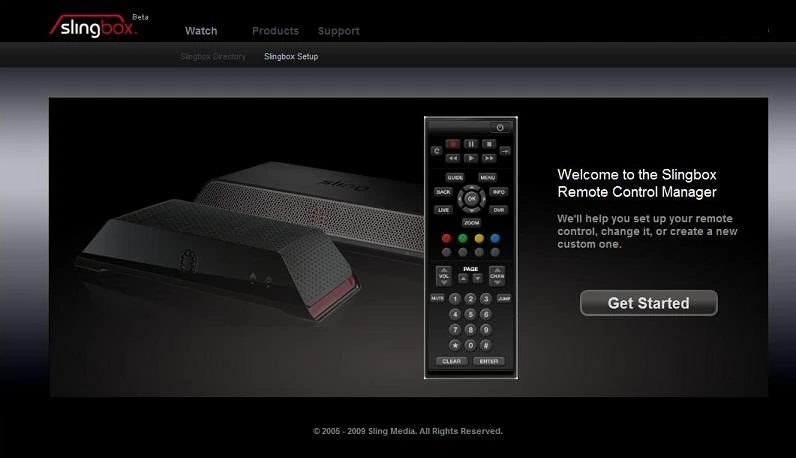
Get Started[]
This is the front page of the Betaremote site. There's nothing much to do here except to click "Get Started" button to begin the process.
Choose Device[]
The next page from the Betaremote title page is the Slingbox selection from your Slingbox Directory. If you have multiple Slingboxes then you should choose the one closest to you. This is important since there is a short time-out period which you can teach the remote codes. Running back and forth really isn't an option. If your computer isn't next to your Slingbox, then it would be a good idea to either use a laptop or a wireless input device so you can interact with the website while being next to your Slingbox.

Add / Select a Remote[]
This is the main control panel for Betaremotes. Here you'll have four basic options.
- Back: Returns to the previous page
- Import Remote: Import Remote Control Panel
- Create Remote: Remote Learning Tool
- Pre-existing learned remote profile(s)*: Configuration and export options

The top row of pre-existing remotes will not show up until you created at least one learned remote profile. If you have already created remote profiles, or imported them into your Sling Account then allow a minute for them to appear. It takes time for the Web Slingplayer plug-in to parse through the available remotes. Also, if you share a Slingbox with seperate Sling Accounts, you will only be able to see the remotes associated with each specific account.
Remote Learning Tool[]
The remote learning tool is a configuration wizard which can be broken down into five steps.
Naming[]
Defining the remote profile is the easiest step of the process. It affects how the remote appears in Pre-Existing Remote Profile.
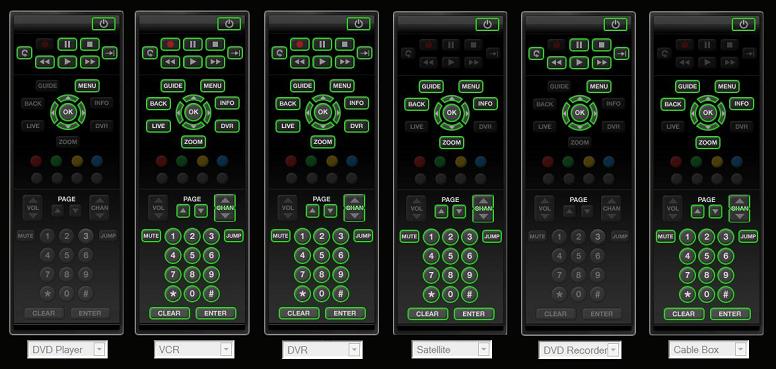
At this screen, there are four settings to define the profile.
- Device Type
- DVD Player (14 buttons)
- VCR (41 buttons)
- DVR (41 buttons)
- Satellite (31 buttons)
- DVD Recorder (14 buttons)
- Cable Box (31 buttons)
- Manufacturer: Manufacturer of the Set-top Box.
- Model Name: Model of the Set-top box.
- Remote Nickname: Name of the Remote Profile.

The device type selection will determine the total number of buttons which the Remote Learning Wizard will walk you through. Don't worry if the configuration wizard skips any buttons that you want to program. You can enable the greyed out buttons during the testing process then teach them during the reprogramming step.
Teaching
There will be an embossed arrow on the bottom left-hand corner of the Slingbox which will indicate the "general" vicinity the remote will need to be pointed. You'll probably need to adjust the distance and angle as your teaching the first few keys. Despite the instructions, you may have to hold the remote against the Slingbox, a few inches away, or somewhere in between. It may take quite a few attempts before you find the right position for a consistant read.
As you're teaching each button, it will be outlined in yellow and toggle to green when its complete. You will have about 5 seconds for it to "see" a signal otherwise it will timeout. The mouse pointer will change a few seconds after it recognizes an IR signal and may take another 5 to 10 seconds to learn the code. This is why its a good idea to perform it with a laptop next to the Slingbox or have someone help with the process.
<img data-rte-meta="%7B%22type%22%3A%22image%22%2C%22wikitext%22%3A%22%5B%5BFile%3ABetaremote-teaching.jpg%7Ccenter%5D%5D%22%2C%22title%22%3A%22Betaremote-teaching.jpg%22%2C%22params%22%3A%7B%22align%22%3A%22center%22%2C%22caption%22%3A%22%22%2C%22alt%22%3A%22Betaremote-teaching.jpg%22%7D%7D" data-rte-instance="146591-1744467584f0858187242e" alt="" src="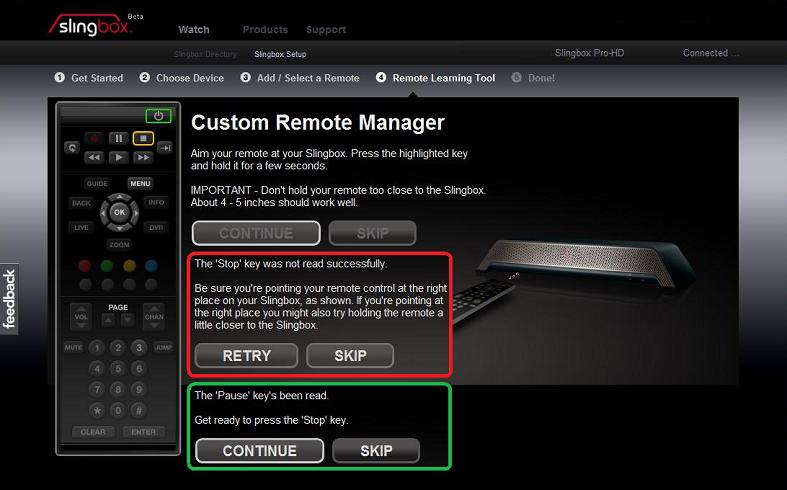 " width="787" height="490" class="image alignCenter" type="image" />
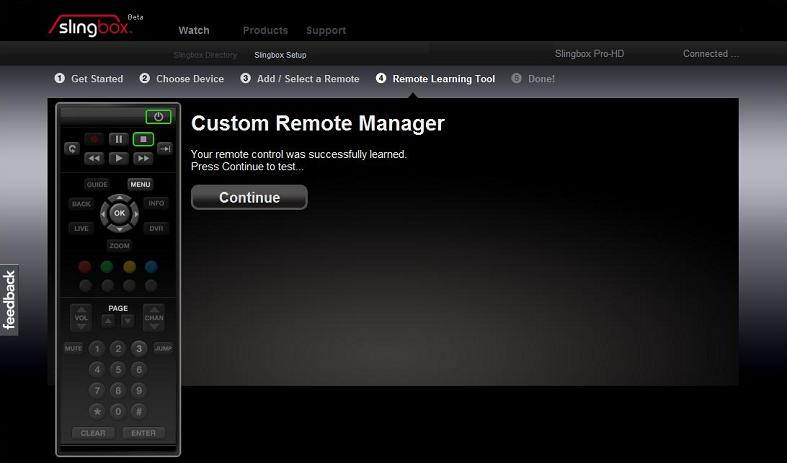
During the process, you'll have three options, continue, skip, and retry. While you're teaching the Slingbox, you will be promted with the button that's next. Pressing "Continue" will start the learning process. Opting to "Skip" the button will grey out the button and move to the next button. If the learning process times out or fails then you'll also have the option to "Retry" until it is successful.
<img data-rte-meta="%7B%22type%22%3A%22image%22%2C%22wikitext%22%3A%22%5B%5BFile%3ABetaremote-learningc.jpg%7Ccenter%5D%5D%22%2C%22title%22%3A%22Betaremote-learningc.jpg%22%2C%22params%22%3A%7B%22align%22%3A%22center%22%2C%22caption%22%3A%22%22%2C%22alt%22%3A%22Betaremote-learningc.jpg%22%7D%7D" data-rte-instance="146591-1744467584f0858187242e" alt="" src="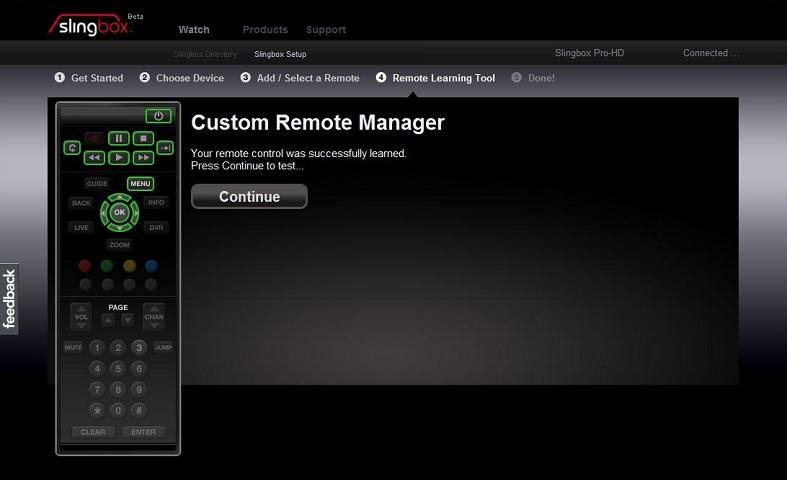 " width="787" height="480" class="image alignCenter" type="image" />
Once you've gone through systematic number of buttons then you'll be prompted to test the buttons.
Testing[]
During the testing phase, you're not confined to a rigid path as you were with the teaching process. You can hop around a bit. When you initally come to this step, you will see two types of buttons on the remote; enabled and disabled. The disabled buttons will look greyed out, whereas the enabled buttons are more vibrant.
Pressing on an enabled button will mark the button blue and initiate the IR commands to be sent through the Slingbox. This will be followed by a dialog box asking whether the key worked or if you want to disable the button. At this point, if you select "Yes" then the button is marked with a green outline to signify that it has been tested. Selecting "No" will outline the button with yellow which allows you to queue the keys to be reprogrammed later. Finally "Disable" will grey out the button.

Pushing a disabled button will pop-up a message specifying whether or not you want to program it. Marking "Yes" within the dialog box will mark the button with a yellow outline. It will then be included with the other buttons marked yellow when you elect to reprogram them. If you select "No" to this dialog then the button will remain disabled.

Once you've finished testing the buttons, you can press "(re)Program" to go through the process of refreshing the buttons which have been marked yellow. It's always a good idea to test the buttons and reprogram them if necessary that way you don't have to spend time going back and forth.
If you're comfortable that you've completed the process, you can skip the reprogramming by selecting "I'm Finished" at anytime during the testing phase. This will forward you into the uploading the remote to your Slingbox. However, regardless of the color outlines around the buttons, any buttons marked disabled will not be accessible. Also, you'll be able to push any buttons that were enabled whether or not they actually work.
Reprogramming[]
The process of reprogramming is the exactly the same as teaching, except you only have to reprogram the buttons which were marked with a yellow outline during the previous phase. Once you've completed this process you are sent back into testing.
Uploading[]
At this point, all that is necessary is to pick the video source, select continue, and wait for the upload to complete.
Three selections for input:
- Composite
- S-Video
- Component

"ANT - External box (cable box, satellite reciever, DVR, etc.)" is not currently a valid selection
Done![]
That's it. You've completed the Remote learning process. The remote skin that's associated with this profile is SlingCustomRemote and looks slightly different than the one seen here.

Pre-existing learned remote[]
This is the control for a specific pre-existing remote. Here are your options.
- Back - go back to the previous screen
- Delete - deletes this remote
- Edit - reconfigures this remote
- Save to File - exports this remote profile into an "myRemote.lrz" file.

Delete[]
This option will remove the respective remote from Slingbox's profile that associated with your account.

Edit[]
The process of editing is the exactly the same as reprogramming, where you can enable greyed out buttons or remark active buttons with a yellow outline in order to change them. Once you've queued which buttons you'd like to change then click [(r)eProgram] to begin the teaching process. Once you've completed reprogramming you are sent back into testing, and finally uploading when you're finished.

Save to File[]
Opting to save the select file, will export the learned profile into a LRZ file. If your operating system has User Access Control (UAC) enabled. You should make sure to save it to a directory where you have write permissions. Note there's no browse button, so you'll need to specify the full directory path and filename if you need to change it from the default location.

Import Remote[]
Importing a LRZ file will upload the specified remote profile onto your account tied to the Slingbox. There is no browse button, so you'll need to specify the full directory path and filename if you need to change it from the default location. Please note it can take up to a minute for the new profile to appear into your account. If it doesn't show up then check the next section about sharing remote profiles.
Sharing Remote Profiles[]
Saving the LRZ file is helpful to share the remote profile to different Slingboxes. However, we've noticed that sharing LRZ between user accounts isn't reliable. This archive format has been nicknamed SlingMedia Compressed Binary (SMCB). Which was taken from the magic numbers within the file header. It is unuseable by any other programs than Sling Media's tools.
Instead of sharing the LRZ file, it is more effective to share the learntremote's guid. This information can be used with the JP1 tools in order to create remote update BIN files for the Slingbox. These BIN files are much more portable and will benefit more people.
The logfile is called, "WebSlingPlayer.txt" and can be found in the following locations.
- Vista "C:\Users\{username}\AppData\Roaming\Sling Media\WebSlingPlayer\"
- XP "C:\Documents and Settings\{username}\Application Data\Sling Media\WebSlingPlayer\"
Seach for pattern "guid=" within the web slingplayer logfile to for the remote guid. The learntremote guid will be a 36 digit identification with letters, numbers, and four dashes. Once found, look for the previous occurrance of the guid string, which should be part of a complete URL. Cut and paste this URL into a new browser window and suffix .xml onto the end and bring up the page. Once the page is loaded, use File > Save Page As to save a local copy. When saving the page, please ensure that the local copy also has the .xml suffix.
